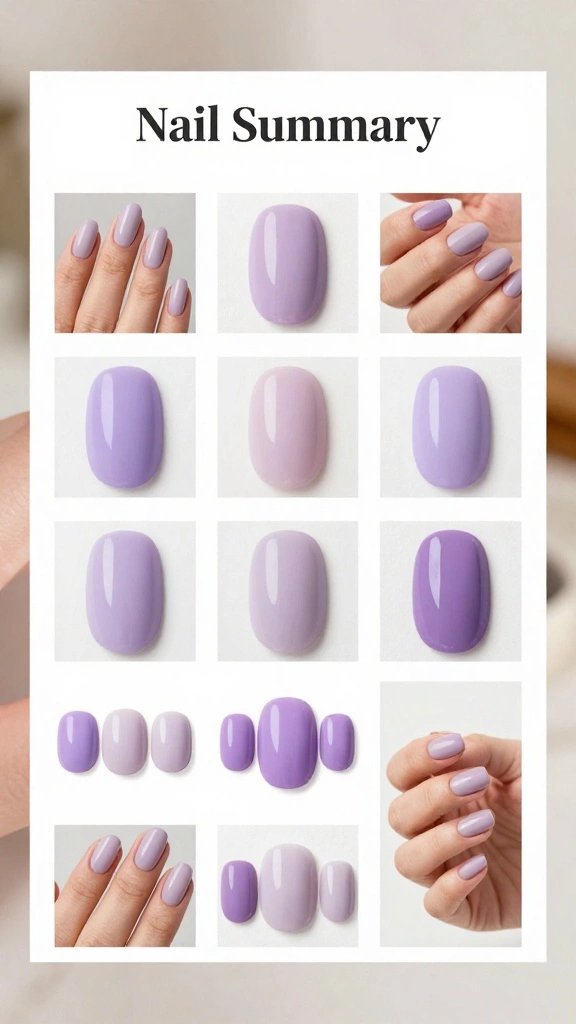
There’s something about minimal nail designs that has me completely obsessed. As we step into 2026, the desire for chic and quick nail art is on the rise. You might be juggling a busy schedule or simply looking for something fresh and stylish to make your nails pop without the fuss. If you’re into trendy looks that require minimal effort, this post is definitely for you.
I’ve gathered 19 stunning minimal nail designs that are quick, stylish, and perfect for any occasion. From the elegant appeal of lilac nails to the eye-catching purple ombre, you’ll find inspiration that your friends will be jealous of. These designs not only elevate your look but also save you time and effort, making them ideal for anyone who loves to keep it simple yet chic.
Get ready to explore a variety of nail designs that combine simplicity with style. Whether you’re headed to brunch or a night out, these quick nail ideas will help you stand out. Let’s dive in and discover how you can achieve a fashionable manicure in no time!
Key Takeaways
– Discover 19 minimal nail designs that are easy to achieve and perfect for any occasion, focusing on quick applications.
– Explore the trendy lilac nails and purple ombre that are making waves in 2026, ideal for those who want to stay stylish.
– Each design option is both chic and simple, ensuring you don’t spend hours at the salon.
– Learn practical techniques for minimalist nail art, such as using dot designs or clear tips.
– Use these quick tips to elevate your nail game without sacrificing time or effort, making your manicures the envy of your friends.
Contents
- 1. Chic Lilac Ombre
- 2. Minimalist Lines
- 3. Dot Nail Art
- 4. Clear Tips
- 5. Glitter Accents
- 6. Half-Moon Nails
- 7. Negative Space
- 8. Subtle Marble Effect
- 9. Floral Accents
- 10. Gradient Glitter
- 11. Color Blocked Nails
- 12. Metallic Accents
- 13. Textured Nails
- 14. Simple French Twist
- 15. Layered Colors
- 16. Art Deco Style
- 17. Simple Stripe Designs
- 18. Seasonal Themes
- 19. Mixed Patterns
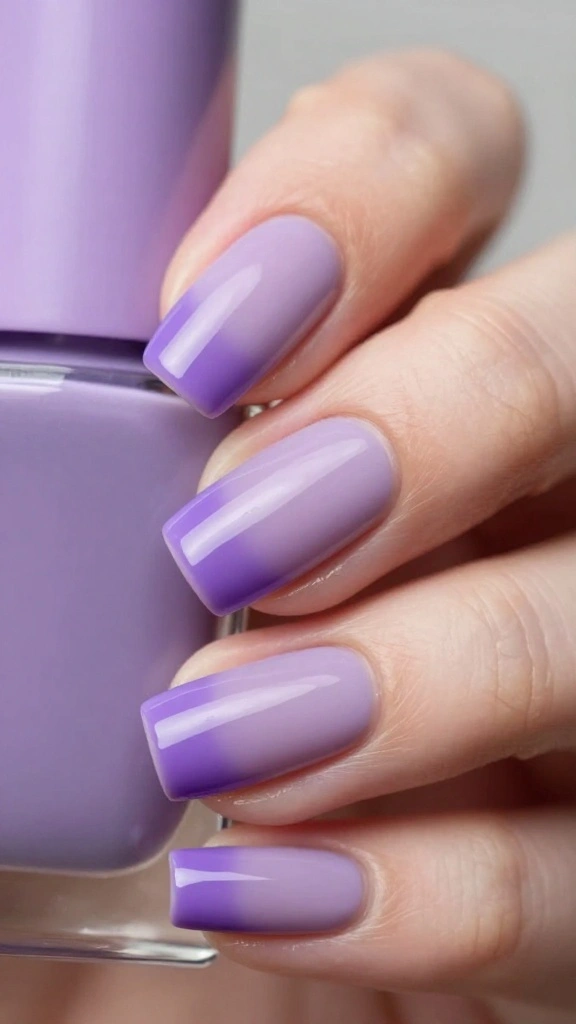
1. Chic Lilac Ombre
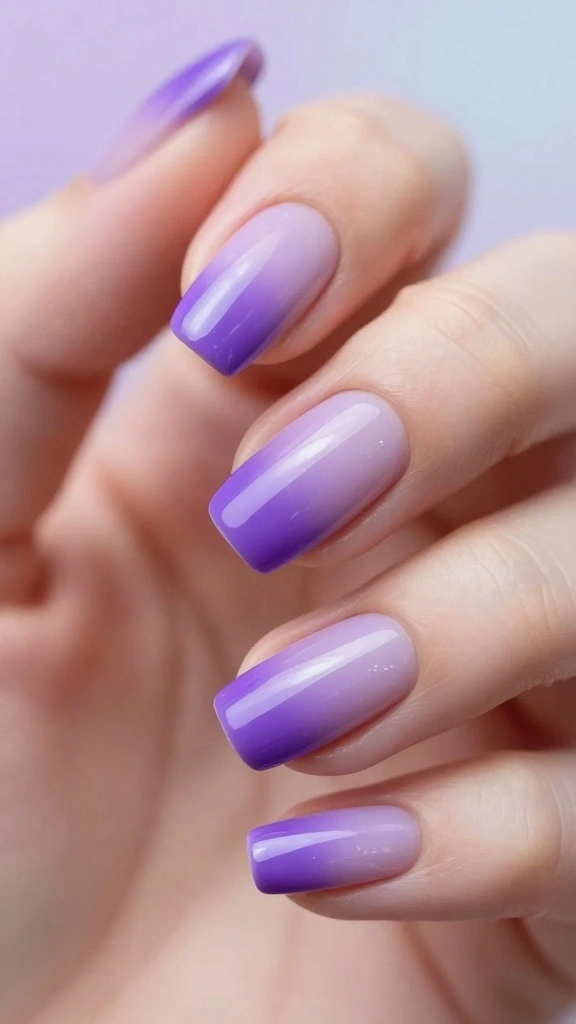
A chic lilac ombre is a stunning choice that exudes sophistication. This beautiful transition from soft lilac to deeper purple creates a graceful and understated look. It’s the perfect design for any occasion, adding elegance to your everyday style while being surprisingly simple to achieve at home.
Start with a lilac base coat and use a makeup sponge to blend in the darker purple at the tips for that perfect ombre effect. Clean up any excess polish around the nails with a brush dipped in remover for a polished finish.
For a perfect ombre:
– Use a high-quality topcoat to enhance shine.
– Allow each layer to dry completely before adding the next.
– Consider using a clear polish to help blend colors seamlessly.
This design is quick to create and stylish, ensuring you’ll receive plenty of compliments from friends and admirers alike!
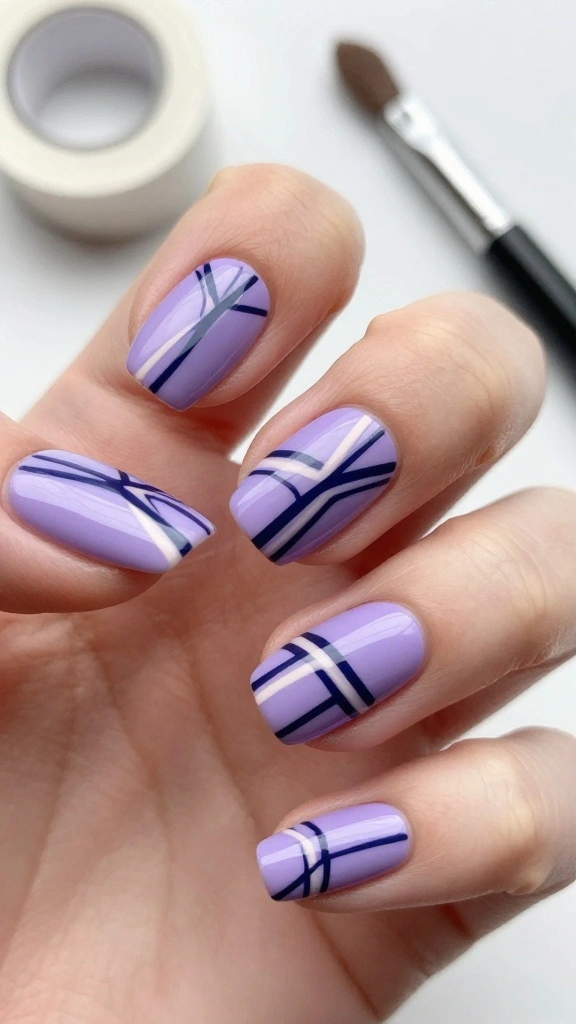
2. Minimalist Lines
Minimalist lines are a perfect blend of modern elegance and simplicity. By painting one or two fine lines across your nails, you achieve a chic look that stands out without being overwhelming. This design is ideal for those who are short on time, taking just minutes to create.
Start with a bright base color, like white or nude, and use a thin brush to add contrasting lines in shades like gold or black. This nail art is quick and perfect for busy days when you want to look stylish without a lot of effort.
To perfect minimalist lines:
– Steady your hand by resting your elbow on a flat surface.
– Use striping tape for precise lines if you’re unsure with a brush.
– Mix and match colors for a personalized touch.
This design adds an artistic flair to your look, making it effortlessly chic!
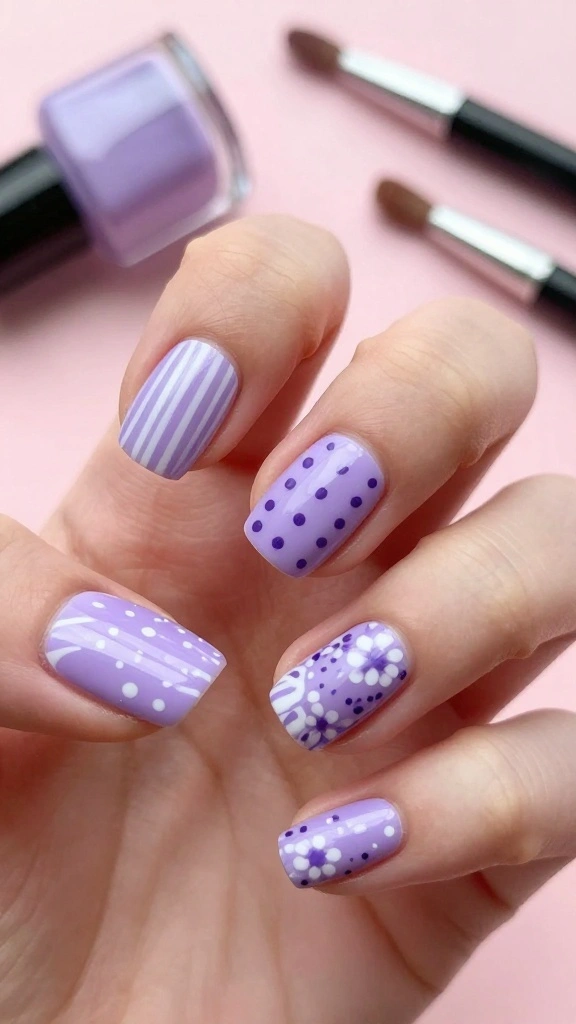
3. Dot Nail Art
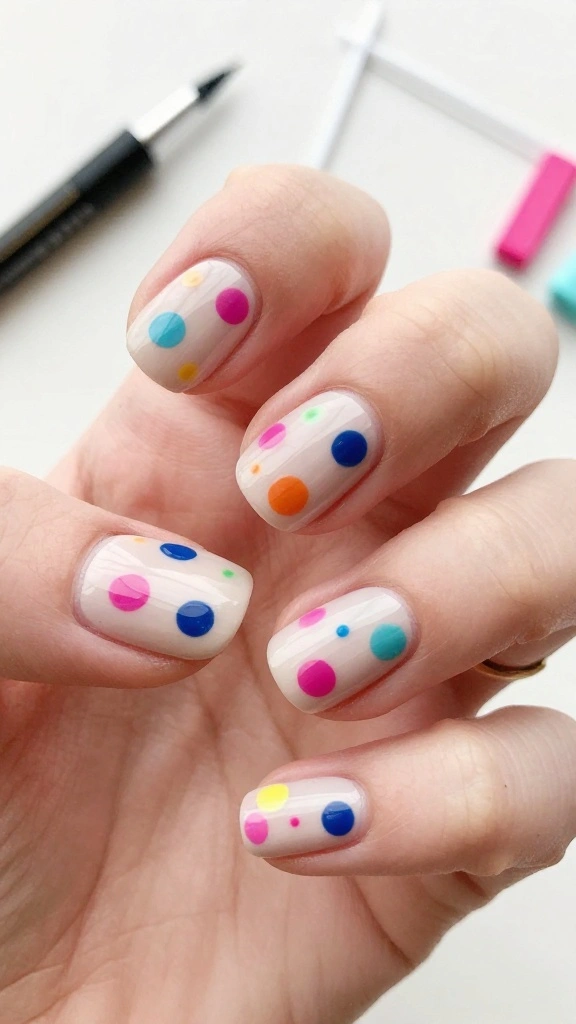
Dot nail art is a fun and playful way to elevate your nail game. This design features tiny dots in various colors on a neutral base, creating a stylish and whimsical look. Its versatility allows for everything from classic polka dots to intricate floral patterns, making it perfect for any occasion.
This technique is quick to execute, allowing you to easily refresh your nails between meetings or social events. Just grab a dotting tool or even a bobby pin to create your dots with ease.
To achieve flawless dot designs:
– Start with a solid base coat for vibrant colors.
– Vary dot sizes for a dynamic effect.
– Outline your dots with a thin brush for added definition.
With this design, you’ll channel your inner artist while keeping things chic and effortless!
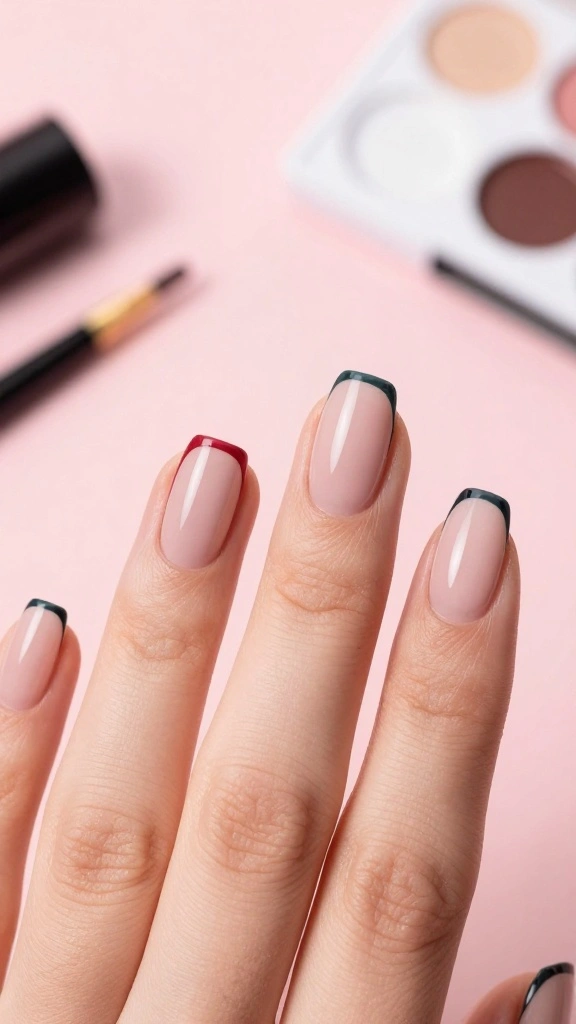
4. Clear Tips
Clear tips offer a fresh take on the classic French manicure. Instead of the usual white tips, try a soft lilac for a modern twist that feels both trendy and polished. This design is perfect for anyone looking for a clean, sophisticated look that remains minimalist.
The application is simple—start with a clear or nude base, then apply your chosen lilac at the tips for a stylish contrast.
For the best results with clear tips:
– File your nails into a perfect shape before applying polish.
– Use a thin brush for clean lines between the base and tips.
– Finish with a glossy topcoat for that professional touch.
This design is ideal for work or special occasions, leaving a lasting impression of elegance wherever you go.
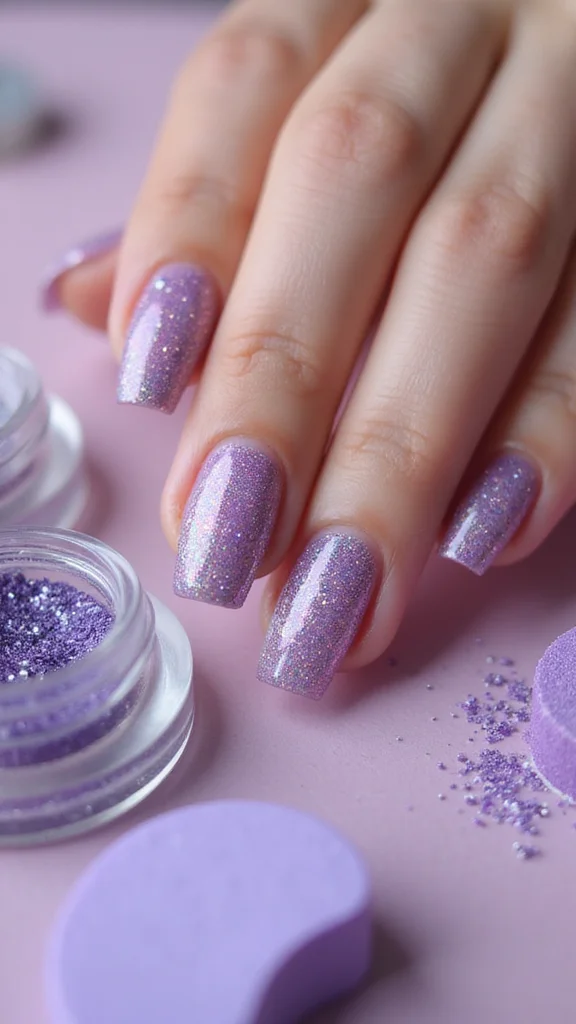
5. Glitter Accents
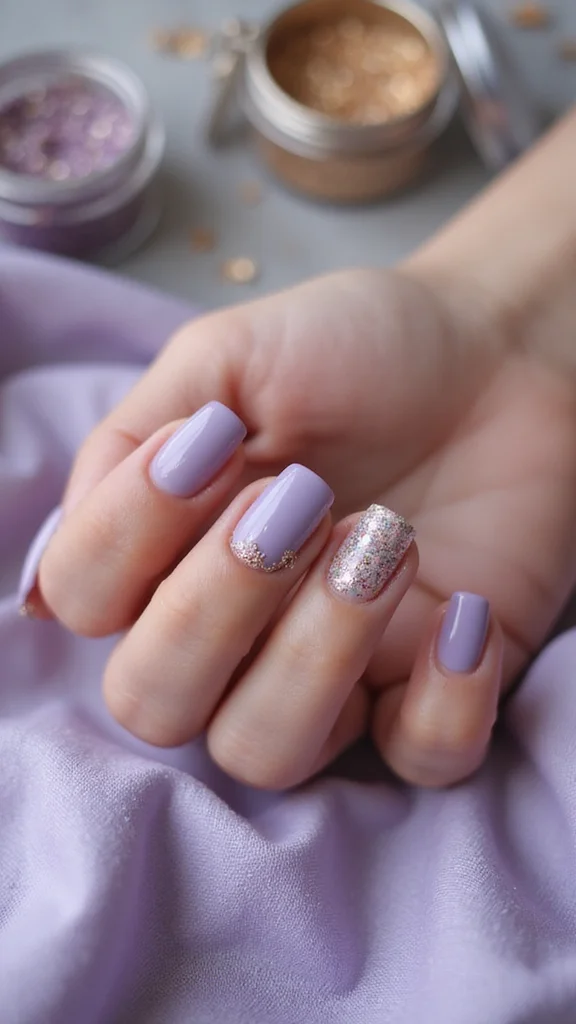
Add a sparkling twist to your nails with glitter accents! Start with a soft lilac base and apply fine glitter to one or two accent nails for an eye-catching effect. This design is not only fun but perfect for nights out or special events, ensuring your nails shine without going overboard.
The key to mastering glitter accents is to keep it minimal for a chic look. You can mix different types of glitter to achieve unique styles that complement your outfit.
To create stunning glitter accents:
– Apply a clear topcoat over glitter to secure it in place.
– Use a makeup sponge for precise application.
– Experiment with chunky or fine glitter for a variety of effects.
With glitter accents, you can easily elevate your nail game while keeping things stylish!
6. Half-Moon Nails
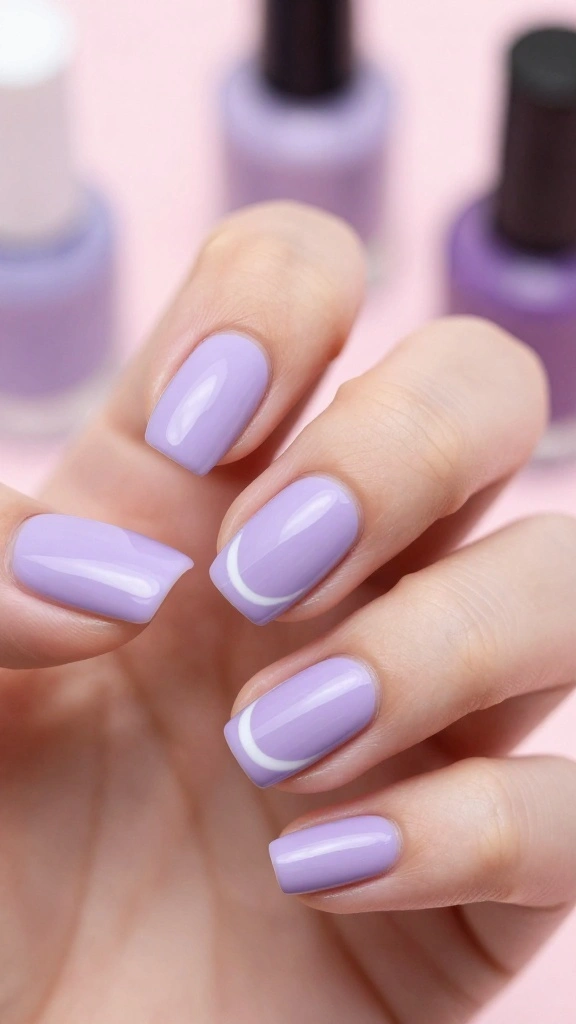
Half-moon nails blend vintage charm with modern flair, featuring a contrasting color at the base of the nail. This design can be softened by using lilac for both the moon and tip, creating a fresh and stylish appearance. It elongates the fingers beautifully, adding a touch of elegance to your look.
To create half-moon nails, simply use circular stickers or tape to outline the area you want to color.
For perfect half-moon nails:
– Ensure your base color is completely dry before applying the second hue.
– Experiment with different color combinations to express your mood.
– A matte topcoat can give a contemporary vibe.
Half-moon nails are sure to impress, making a chic statement wherever you go!
7. Negative Space
Negative space designs are trendy and artistic! This technique involves leaving parts of the nail unpainted, allowing for creative shapes and patterns. A stark white or clear base with lilac geometric shapes adds a modern touch.
This design is not only visually appealing but also beginner-friendly, as you don’t need to worry about perfect polish application with some areas remaining bare.
To achieve negative space nails:
– Start with a base coat to protect your nails.
– Use tape to create clean lines for your design.
– Finish with a topcoat to seal your work.
With negative space nails, you can showcase your fun personality while maintaining a stylish aesthetic!
8. Subtle Marble Effect
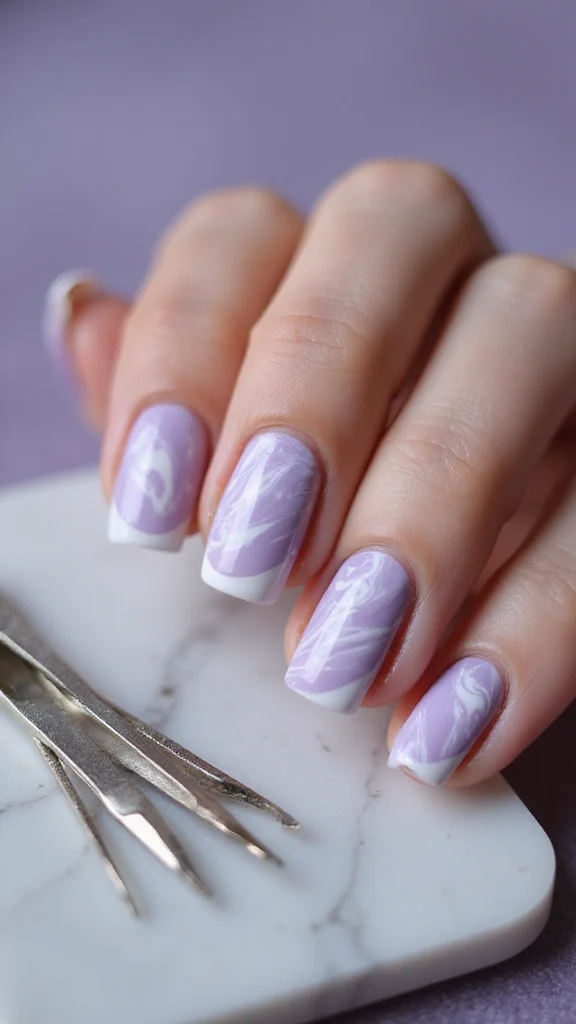
The marble effect is a timeless and elegant style! You can create a subtle marble look with lilac and white to give your nails a sophisticated flair. This design focuses on blending colors softly and minimally, perfect for those who love understated beauty.
Start with a white base coat, then swirl lilac in using a thin brush to create that marble effect.
For a flawless marble finish:
– Use a sponge for better blending of colors.
– Limit the design to a few accent nails for a minimalist touch.
– Seal it all with a glossy topcoat for extra shine.
With a subtle marble effect, your nails will radiate effortless chicness and luxury!
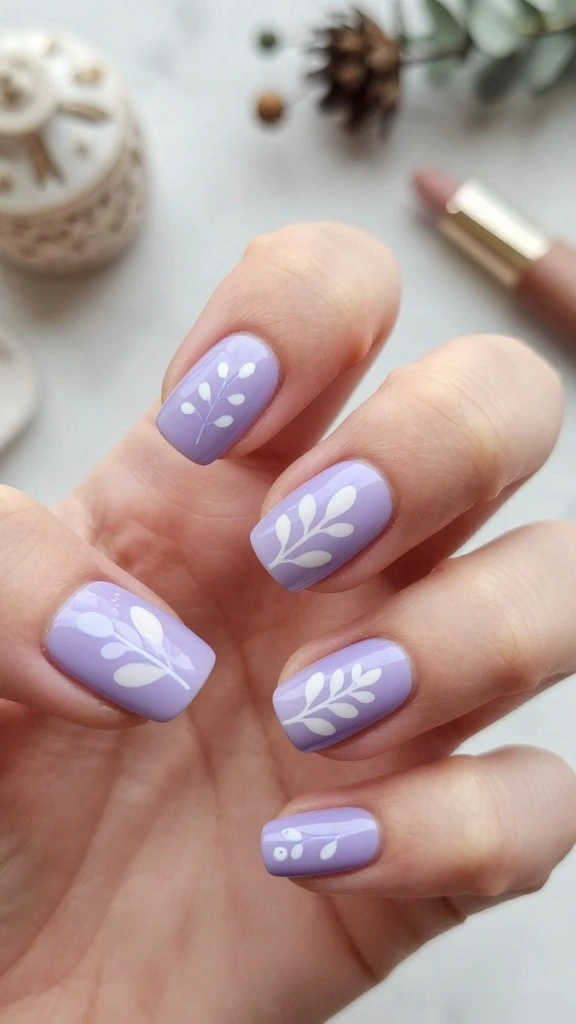
9. Floral Accents
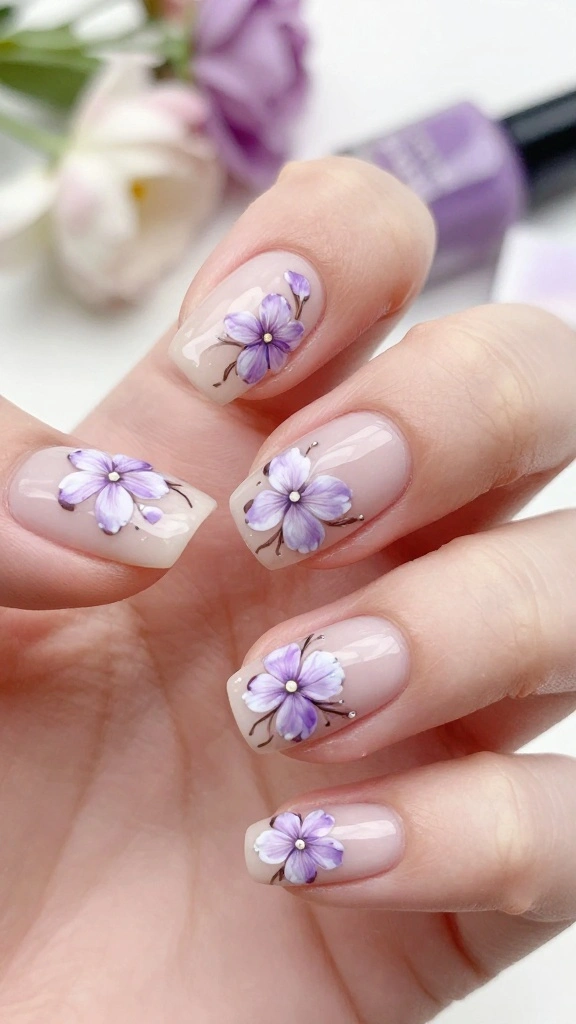
Floral accents add a charming touch of nature to your nails without overwhelming them. Delicate lilac flowers painted on a nude base create a fresh and stylish look perfect for spring and summer. This design can be adapted year-round with different color choices.
You don’t need to be an expert to create this delightful look!
To craft floral accents:
– Use a dotting tool for easy flower designs.
– Choose complementary colors for a cohesive appearance.
– A matte topcoat can give it a vintage feel.
Floral accents breathe life into any outfit, making your nails feel vibrant and fun!
10. Gradient Glitter
Gradient glitter nails are a fun way to combine sparkle with style. Start with a solid lilac base and apply glitter, beginning at the tips and gradually fading towards the cuticle. This design is ideal for parties or nights out, ensuring your nails shine without being overly flashy.
It’s quick to do, and you can easily change the glitter colors to match your outfit or mood.
To master gradient glitter:
– Use a makeup sponge for easy application.
– Layer glitter for a more dramatic look.
– Finish with a topcoat to secure everything.
Gradient glitter nails are playful and flirty, guaranteed to get you noticed!
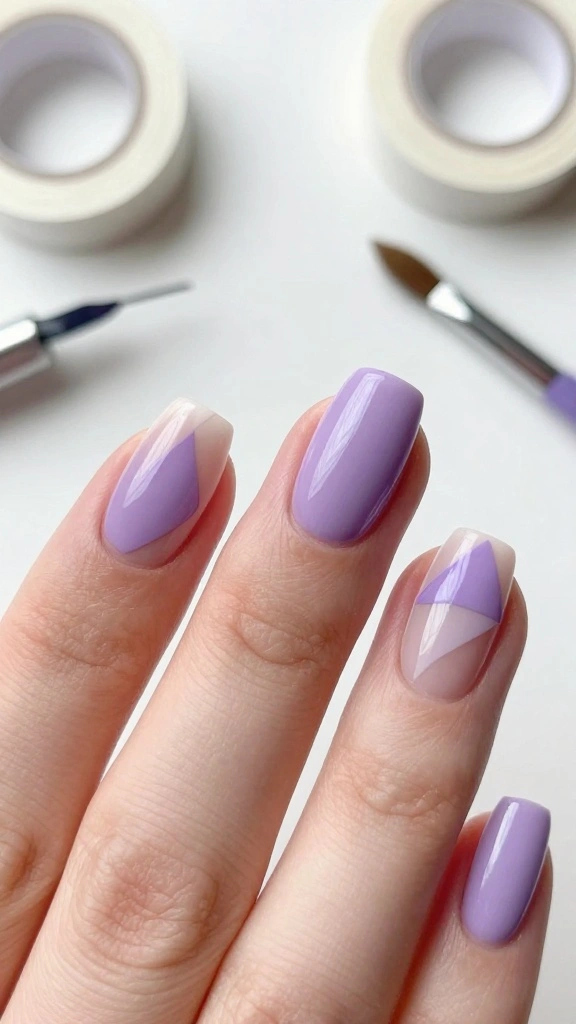
11. Color Blocked Nails
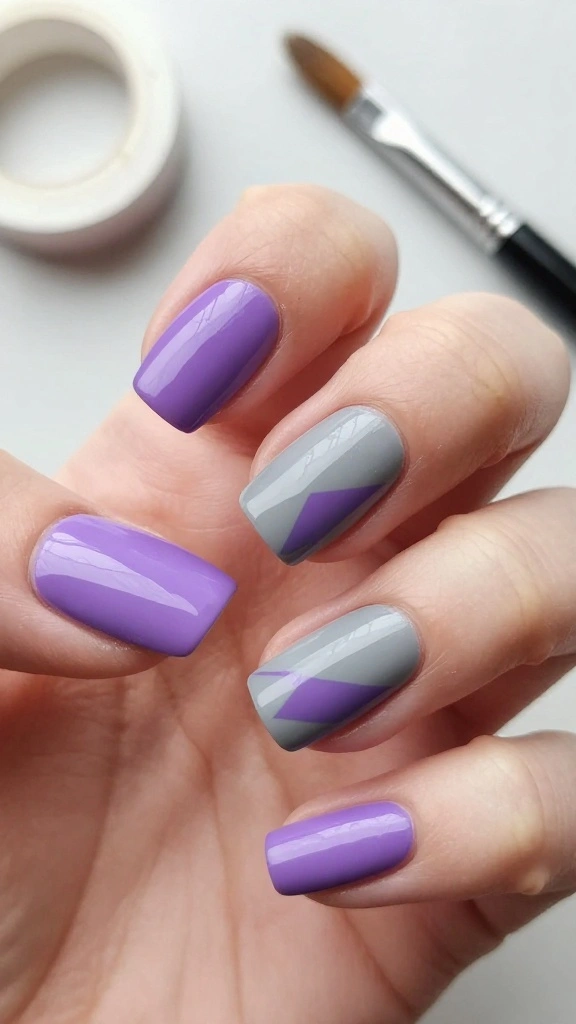
Color-blocked nails offer a sleek and modern look. Pair contrasting shades like lilac with chic grey or white to create geometric shapes on your nails. This design beautifully incorporates negative space, making it effortlessly sophisticated.
It’s perfect for anyone wanting a bold yet minimalist approach to nail art.
To achieve color-blocked nails:
– Use tape to create sharp edges for your designs.
– Play with different shapes like triangles or stripes.
– Choose complementary colors for a cohesive finish.
Color-blocked nails can elevate your look from ordinary to striking in just a few minutes!
12. Metallic Accents
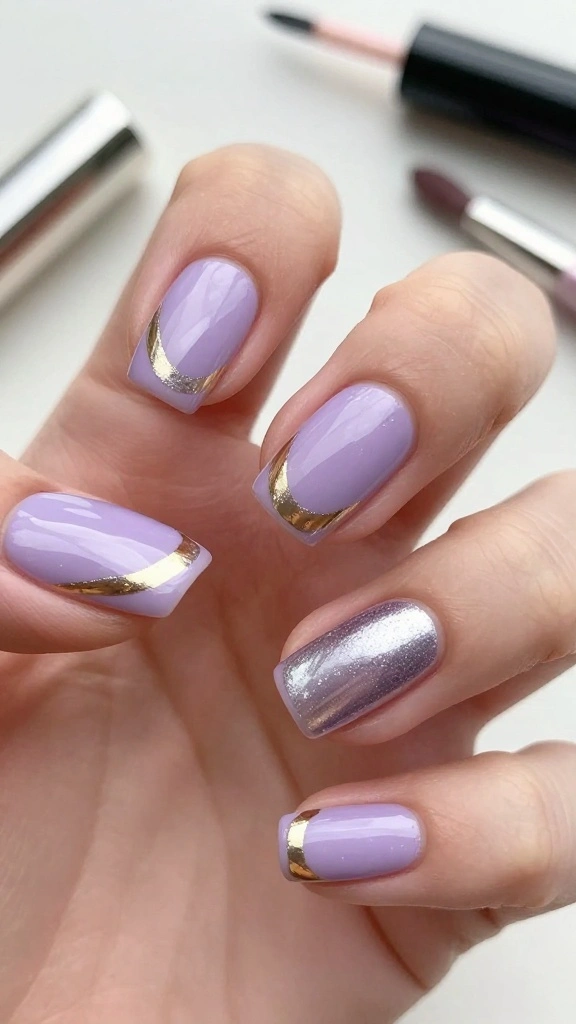
Metallic accents are a fabulous way to add glam to your nail art. Pair a soft lilac base with shiny gold or silver accents for a stunning effect. This look is versatile, making it suitable for both casual and formal occasions.
The addition of metallic elements elevates your overall nail design with minimal effort.
To nail the metallic accents:
– Use a fine brush for precise application.
– Consider striping tape to create clean lines.
– Seal with a glossy topcoat for a brilliant shine.
Metallic accents ensure your nails always pop, keeping you fashionable and trendy!
13. Textured Nails

Texture adds an interesting depth to nail designs in a subtle way. Use a lilac base paired with a textured top coat to create an eye-catching look without being too loud. This approach gives your nails a unique, tactile element that draws attention without the need for intricate designs.
To create textured nails:
– Look for textured topcoats that complement your base color.
– Choose between matte or shiny topcoats based on your preference.
– Keep the design simple for a minimal yet stylish finish.
Textured nails are all about elegance and simplicity, making them perfect for any occasion!
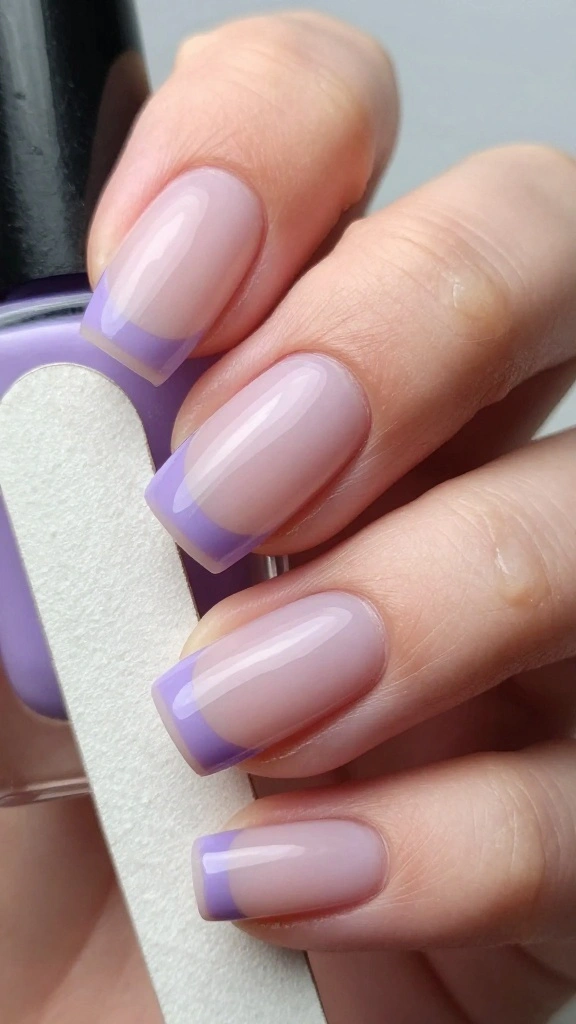
14. Simple French Twist
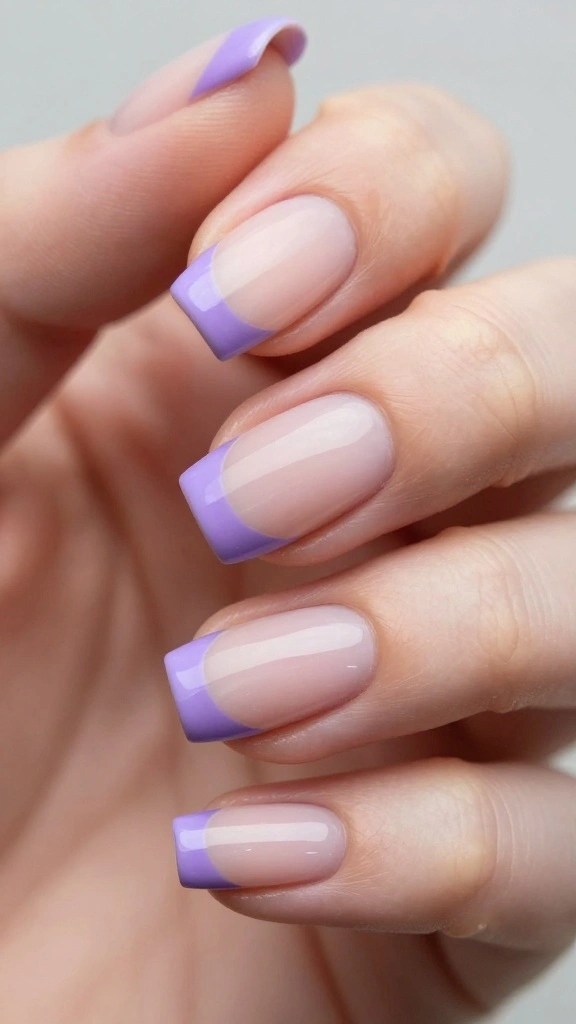
The simple French twist introduces a modern touch to the classic French manicure. Replace the typical white tips with lilac for a refreshing update that feels both traditional and contemporary. This design is versatile and suitable for any occasion.
To achieve this look, follow the classic French manicure steps but use lilac instead of white polish.
For the best results:
– Ensure your base color is dry before adding the tips.
– Use nail guides or tape for cleaner lines.
– A glossy topcoat will enhance the overall polish of the design.
The simple French twist is a chic and quick nail design that always looks polished!
15. Layered Colors
Layering colors can create a unique and stylish effect. Choose a soft lilac base and layer it with a slightly darker purple for a chic ombre effect at the tips or on an accent nail. This design is perfect for experimenting with shades and creating a personalized look.
It’s easy to do and can be adjusted for any occasion, whether casual or formal.
To achieve layered colors:
– Start with a base coat to protect your nails.
– Apply the darker shade while the base is still tacky for better blending.
– Finish with a glossy topcoat for a sleek finish.
Layered colors not only look stylish but also allow for a unique expression of your personality!
16. Art Deco Style
Art Deco style nails celebrate bold geometric patterns and vibrant colors. For a minimalist approach, use lilac as a base and incorporate simple Art Deco shapes in a contrasting color. This design is striking and perfect for making a fashion statement.
The clean lines and angular shapes ensure your nails stand out while remaining chic.
To achieve Art Deco style:
– Use nail strips for clean lines and geometric shapes.
– Keep your color palette limited for a sophisticated look.
– A matte topcoat can enhance the geometric design.
With Art Deco style nails, you can showcase your artistic flair while keeping it classy!
17. Simple Stripe Designs

Simple stripe designs are a quick way to elevate your nail look. Choose a lilac base and add thin white or gold stripes for a chic and modern touch. This design is easy to create and versatile for many occasions, combining simplicity with sophistication.
To get the stripes just right:
– Use striping tape for clean lines.
– Mix different stripe widths for a playful effect.
– Finish with a topcoat to smooth everything out.
Simple stripe designs ensure your nails look effortlessly polished every time!
18. Seasonal Themes
Seasonal themes add a fun twist to nail art. Use lilac as a base and create simple seasonal icons, like snowflakes for winter or flowers for spring. This design allows room for creativity while keeping it minimal, suitable for any time of the year.
To achieve seasonal nail art:
– Use a fine brush for detailed designs.
– Choose colors that reflect the season for harmony.
– Keep the overall design simple to maintain a minimalist vibe.
Seasonal themes are a delightful way to express your personality through nail art!
19. Mixed Patterns
Mixed patterns are an adventurous approach to nail art. Combine stripes, dots, and floral elements using a lilac base for a unique and trendy design. This style is perfect for those who love to express their creativity without going overboard.
To keep it stylish, limit your color palette and balance the designs across your nails.
For the best mixed patterns:
– Keep some nails simple while others are elaborately decorated.
– Use a fine brush for detailed sections.
– Balance colors to avoid overwhelming the overall design.
Mixed patterns showcase your fun personality and creativity while remaining chic and stylish!
Conclusion
These minimal nail designs are not only quick to create but also stylish enough to ensure everyone’s eyes are on you.
With everything from chic lilac ombre to playful dots, there’s something here for every mood and occasion. So, get creative and try out these designs for a look that your friends will definitely be jealous of!
Frequently Asked Questions
What are the easiest lilac nails 2026 purple ombre designs to try for a quick, stylish manicure?
To nail lilac nails 2026 purple ombre without spending hours, pick two coordinated lilac shades and follow this quick plan.
1) Prep nails with a fast-drying base coat to smooth the surface. 2) Apply a sheer lilac as the base color. 3) Use a makeup sponge to dab the darker lilac toward the tips for a soft gradient. 4) Clean up edges with a small brush dipped in remover for crisp lines. 5) Seal with a high-gloss top coat (or a quick-dry formula) to lock in the color. This look is quick, stylish, and perfect for showing off your lilac nails 2026 purple ombre vibe.
How can I create a quick and stylish minimal nail design with lilac tones?
Minimal is key for busy days. Try a single-coat lilac base with strategic negative-space cuts or a tiny accent on one nail.
Steps: 1) Prep and apply a pale lilac as the base. 2) Paint a thin diagonal or corner cutout with a lighter or darker lilac for contrast. 3) Leave the rest of the nail naked or add a subtle line near the cuticle. 4) Finish with a top coat for shine and durability. This approach stays stylish and quick, especially for lilac nails 2026 purple ombre moments when you want impact with minimal effort.
Which tools and polishes work best for achieving lilac nails 2026 purple ombre at home?
For the best results on lilac nails 2026 purple ombre, gather: 2–3 lilac polishes (light, medium, and a compact shading shade), a clear base coat, a quick-dry top coat, a makeup sponge for the gradient, a small cleanup brush, and a cuticle pusher.
Tips: choose formulas with good adhesion and one-stroke coverage. If you’re doing gel, use a LED lamp as directed. With the right polish choices, your lilac nails 2026 purple ombre will look stylish and last longer.
How long does a lilac nails 2026 purple ombre manicure typically take, and how can I speed it up?
A typical lilac nails 2026 purple ombre manicure can take about 20–40 minutes at home, depending on practice.
Speed tips: prep efficiently with dry nails ready, use a quick-dry top coat, and master a one-stroke gradient with a sponge for faster blending. Keep layers thin to reduce dry time, and use a top coat that dries tack-free in minutes for that quick finish.
How do I maintain lilac nails 2026 purple ombre and keep them looking stylish between manicures?
Keep the lilac nails 2026 purple ombre fresh between sessions by protecting them daily.
Tips: apply a fresh layer of top coat every 2–3 days, use cuticle oil to prevent dryness, wear gloves for chores, and remove with a gentle, non-acetone formula. When you notice tip wear, do a quick touch-up on the gradient with a tiny amount of polish and seal again for a prolonged, stylish look.